Download presentation
Presentation is loading. Please wait.

2
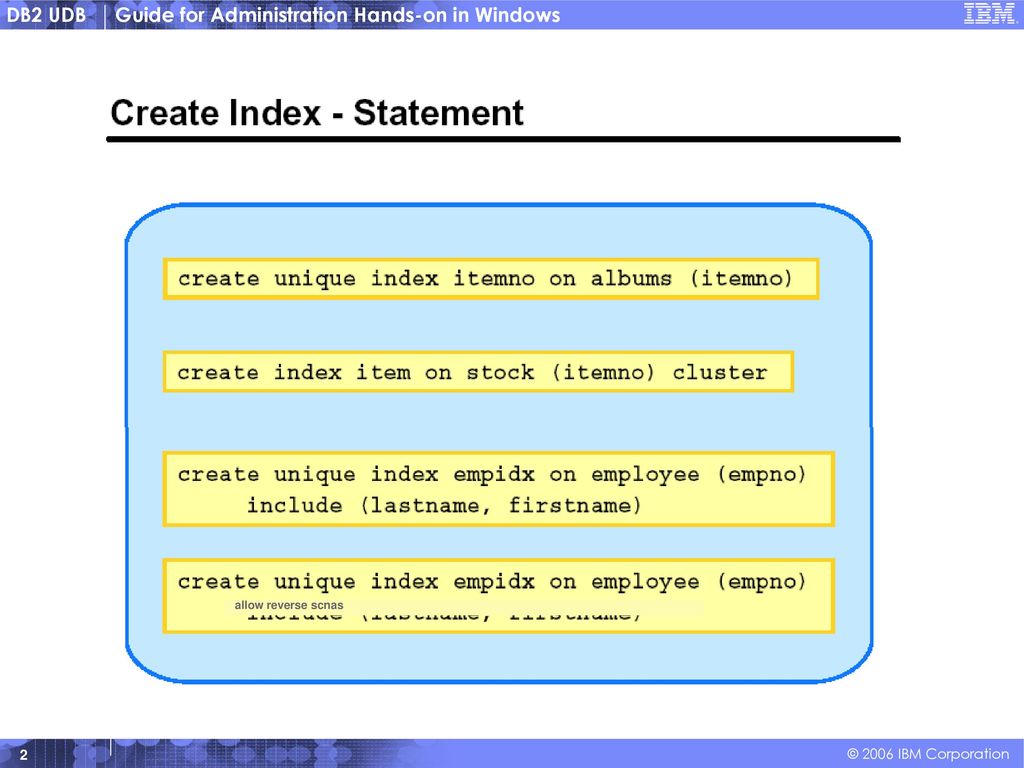
allow reverse scans allow reverse scnas

5
1. dbxxxxxx에 접속하십시오. db2 connect to dbxxxxxx 2. userxxxxxx 라는 스키마를 생성한 후, user01 이라는 사용자에게 그 사용 권한을 부여하십시오. db2 create schema userxxxxxx authorization user01 3. 스키마 KES 에 대한 정의를 확인하십시오. db2 "select * from syscat.schemata where schemaname=‘USERXXXXXX'" 4. 테이블 userxxxxxx.dept와 userxxxxxx.empl을 생성하기 위한 DDL문을 작성하여 xxxxxx.db2 라는 파일로 저장합니다. 각 DDL문은 세미콜론(; 부호)로 구별합니다. create table userxxxxxx.dept ( id smallint not null, name varchar(20) not null, man smallint, budget int ) in ts04_xxxxxx; create table userxxxxxx.empl ( name varchar(30) not null, sex char(1), mydept smallint, hiredate date, salary smallint, varchar(30) not null, resume clob(1K) not logged ) in ts01_xxxxxx index in ts02_xxxxxx long in ts03_xxxxxx; 5. xxxxxx.db2 파일을 이용하여 테이블 userxxxxxx.dept와 userxxxxxx.empl을 생성하십시오. db2 -svtf xx.db2 6. userxxxxxx.dept 테이블에 대한 인덱스를 다음과 같이 생성하십시오. db2 "create unique index userxxxxxx.dept_X on userxxxxxx.dept (id) include (name) cluster"
로 구별합니다. create table userxxxxxx.dept ( id smallint not null, name varchar(20) not null, man smallint, budget int. ) in ts04_xxxxxx; create table userxxxxxx.empl ( name varchar(30) not null, sex char(1), mydept smallint, hiredate date, salary smallint, varchar(30) not null, resume clob(1K) not logged. ) in ts01_xxxxxx index in ts02_xxxxxx long in ts03_xxxxxx; 5. xxxxxx.db2 파일을 이용하여 테이블 userxxxxxx.dept와 userxxxxxx.empl을 생성하십시오. db2 -svtf xx.db2. 6. userxxxxxx.dept 테이블에 대한 인덱스를 다음과 같이 생성하십시오. db2 create unique index userxxxxxx.dept_X on userxxxxxx.dept (id) include (name) cluster")
6
7. userxxxxxx.empl 테이블에 대한 인덱스를 다음과 같이 생성하십시오.
db2 "create unique index userxxxxxx.empl_X on userxxxxxx.empl (id) cluster" db2 "create index userxxxxxx.empl_A on userxxxxxx.empl (mydept)" 8. userxxxxxx.dept 테이블에 대해 다음과 같이 기본키를 추가하십시오. db2 "alter table userxxxxxx.dept add constraint dept_pk primary key (id)" 9. userxxxxxx.empl 테이블에 대해 다음과 같이 제약 조건들을 추가하십시오. db2 "alter table userxxxxxx.empl add constraint empl_pk primary key (id)" db2 "alter table userxxxxxx.empl add constraint empl_uk unique ( )" db2 "alter table userxxxxxx.empl add constraint empl_fk foreign key (mydept) references userxxxxxx.dept on delete restrict" db2 "alter table userxxxxxx.empl add constraint empl_cc check (sex in (‘M’,'F’))" 10. 테이블 kes.empl 에 관한 정보를 확인하십시오. db2 describe table userxxxxxx.empl db2 "select * from syscat.tables where tabschema=‘USERxxxxxx'and tabname ='EMPL'" db2 "select * from syscat.references where tabschema=‘USERxxxxxx'and tabname ='EMPL'" db2 "select * from syscat.colchecks where tabschema=‘USERxxxxxx'and tabname ='EMPL'" db2 "select * from syscat.checks where tabschema=‘USERxxxxxx'and tabname ='EMPL'" db2 "select * from syscat.keycoluse where tabschema=‘USERxxxxxx'and tabname ='EMPL'" 11. 테이블 userxxxxxx.empl의 인덱스에 관한 정보를 확인하십시오. db2 describe indexes for table userxxxxxx.empl show detail db2 "select * from syscat.indexes where tabschema=‘USERxxxxxx'and tabname ='EMPL'" 12. 아래의 insert 문을 실행하십시오. db2 "insert into userxxxxxx.dept values (1,’총무부’,10,100), (2,’기획부’,5,250), (3,’개발부’,20,140)" 13. 아래의 insert 문을 실행하십시오. db2 "insert into userxxxxxx.empl values UDB POST’)" db2 "insert into userxxxxxx.empl values 14. userxxxxxx.empl 테이블에 대해 아래의 뷰를 생성하십시오. db2 "create view empl_v1 as select * from userxxxxxx.empl where salary > 200 with check option" db2 "create view empl_v2 as select a.name employee, b.name department from userxxxxxx.empl a, userxxxxxx.dept b where a.mydept = b.id"
 cluster db2 create index userxxxxxx.empl_A on userxxxxxx.empl (mydept) 8. userxxxxxx.dept 테이블에 대해 다음과 같이 기본키를 추가하십시오. db2 alter table userxxxxxx.dept add constraint dept_pk primary key (id) 9. userxxxxxx.empl 테이블에 대해 다음과 같이 제약 조건들을 추가하십시오. db2 alter table userxxxxxx.empl add constraint empl_pk primary key (id) db2 alter table userxxxxxx.empl add constraint empl_uk unique ( ) db2 alter table userxxxxxx.empl add constraint empl_fk foreign key (mydept) references userxxxxxx.dept on delete restrict db2 alter table userxxxxxx.empl add constraint empl_cc check (sex in (‘M’, F’)) 10. 테이블 kes.empl 에 관한 정보를 확인하십시오. db2 describe table userxxxxxx.empl. db2 select * from syscat.tables where tabschema=‘USERxxxxxx and tabname = EMPL db2 select * from syscat.references where tabschema=‘USERxxxxxx and tabname = EMPL db2 select * from syscat.colchecks where tabschema=‘USERxxxxxx and tabname = EMPL db2 select * from syscat.checks where tabschema=‘USERxxxxxx and tabname = EMPL db2 select * from syscat.keycoluse where tabschema=‘USERxxxxxx and tabname = EMPL 11. 테이블 userxxxxxx.empl의 인덱스에 관한 정보를 확인하십시오. db2 describe indexes for table userxxxxxx.empl show detail. db2 select * from syscat.indexes where tabschema=‘USERxxxxxx and tabname = EMPL 12. 아래의 insert 문을 실행하십시오. db2 insert into userxxxxxx.dept values (1,’총무부’,10,100), (2,’기획부’,5,250), (3,’개발부’,20,140) 13. 아래의 insert 문을 실행하십시오. db2 insert into userxxxxxx.empl values UDB POST’) db2 insert into userxxxxxx.empl values 14. userxxxxxx.empl 테이블에 대해 아래의 뷰를 생성하십시오. db2 create view empl_v1 as select * from userxxxxxx.empl where salary > 200 with check option db2 create view empl_v2 as select a.name employee, b.name department from userxxxxxx.empl a, userxxxxxx.dept b where a.mydept = b.id")
7
15. 아래의 update 문을 실행하십시오. 두 번째 update 문은 실패하는 것이 정상입니다.
db2 "update empl_v1 set salary = 220 where id = 1" db2 "update empl_v1 set salary = 190 where id = 1" 16. 뷰 empl_v1, empl_v2의 정의를 확인하십시오. db2 "select * from syscat.tables where tabname like'EMPL_V%'" db2 "select * from syscat.views where viewname like'EMPL_V%'" 17. 아래와 같이 알리아스(별명)를 생성하십시오. db2 create alias empl for userxxxxxx.empl db2 create alias empl_a1 for empl db2 create alias empl_a2 for empl_v1 db2 create alias dept for kes.dept 18. 알리아스 empl에 대해 아래의 select 문을 실행하십시오. db2 "select * from empl" 19. 알리아스 empl의 정의를 확인하십시오. db2 "select * from syscat.tables where type ='A'and tabname like'EMPL%'" 20. mydb에 생성된 테이블의 목록을 확인하십시오. db2 list tables db2 list tables for all db2 list tables for system db2 list tables for user db2 list tables for schema userxxxxxx 21. 임의의 파일을 이용하여 4번과 동일한 방법으로 테이블 update_list 를 생성하십시오. create table update_list ( id smallint not null, name varchar(20) not null, osalary smallint, nsalary smallint, ts timestamp in ts04_xxxxxx;
를 생성하십시오. db2 create alias empl for userxxxxxx.empl. db2 create alias empl_a1 for empl. db2 create alias empl_a2 for empl_v1. db2 create alias dept for kes.dept. 18. 알리아스 empl에 대해 아래의 select 문을 실행하십시오. db2 select * from empl 19. 알리아스 empl의 정의를 확인하십시오. db2 select * from syscat.tables where type = A and tabname like EMPL% 20. mydb에 생성된 테이블의 목록을 확인하십시오. db2 list tables. db2 list tables for all. db2 list tables for system. db2 list tables for user. db2 list tables for schema userxxxxxx. 21. 임의의 파일을 이용하여 4번과 동일한 방법으로 테이블 update_list 를 생성하십시오. create table update_list ( id smallint not null, name varchar(20) not null, osalary smallint, nsalary smallint, ts timestamp. in ts04_xxxxxx;")
8
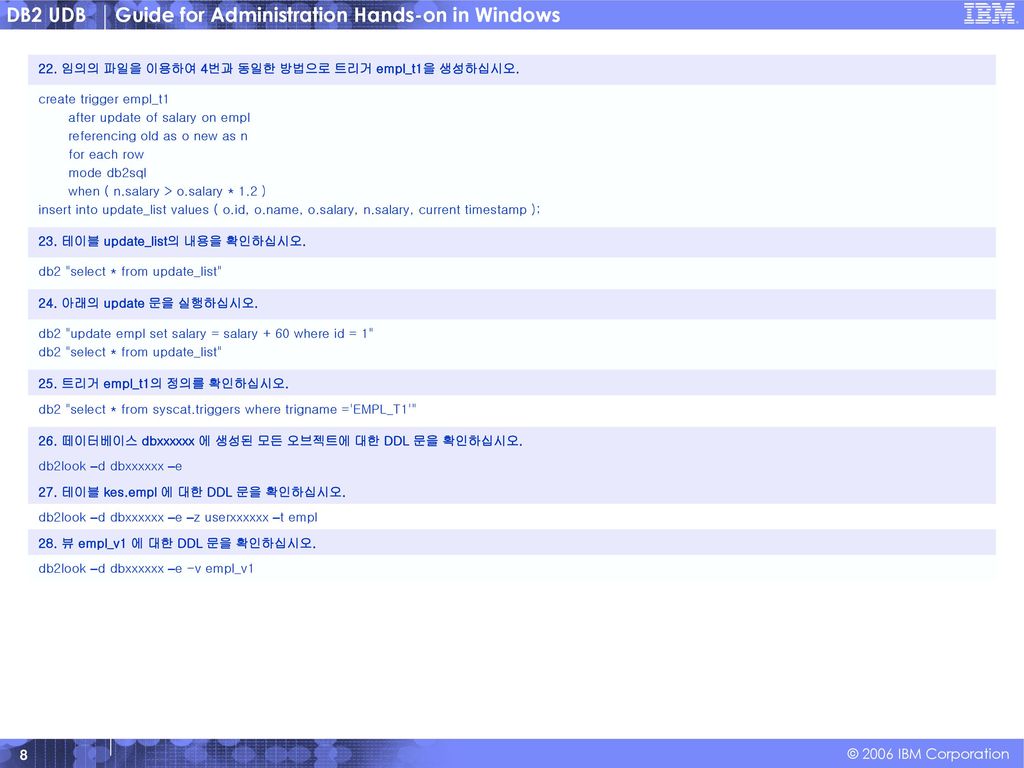
22. 임의의 파일을 이용하여 4번과 동일한 방법으로 트리거 empl_t1을 생성하십시오.
create trigger empl_t1 after update of salary on empl referencing old as o new as n for each row mode db2sql when ( n.salary > o.salary * 1.2 ) insert into update_list values ( o.id, o.name, o.salary, n.salary, current timestamp ); 23. 테이블 update_list의 내용을 확인하십시오. db2 "select * from update_list" 24. 아래의 update 문을 실행하십시오. db2 "update empl set salary = salary + 60 where id = 1" 25. 트리거 empl_t1의 정의를 확인하십시오. db2 "select * from syscat.triggers where trigname ='EMPL_T1'" 26. 떼이터베이스 dbxxxxxx 에 생성된 모든 오브젝트에 대한 DDL 문을 확인하십시오. db2look –d dbxxxxxx –e 27. 테이블 kes.empl 에 대한 DDL 문을 확인하십시오. db2look –d dbxxxxxx –e –z userxxxxxx –t empl 28. 뷰 empl_v1 에 대한 DDL 문을 확인하십시오. db2look –d dbxxxxxx –e -v empl_v1
 insert into update_list values ( o.id, o.name, o.salary, n.salary, current timestamp ); 23. 테이블 update_list의 내용을 확인하십시오. db2 select * from update_list 24. 아래의 update 문을 실행하십시오. db2 update empl set salary = salary + 60 where id = 트리거 empl_t1의 정의를 확인하십시오. db2 select * from syscat.triggers where trigname = EMPL_T1 26. 떼이터베이스 dbxxxxxx 에 생성된 모든 오브젝트에 대한 DDL 문을 확인하십시오. db2look –d dbxxxxxx –e. 27. 테이블 kes.empl 에 대한 DDL 문을 확인하십시오. db2look –d dbxxxxxx –e –z userxxxxxx –t empl. 28. 뷰 empl_v1 에 대한 DDL 문을 확인하십시오. db2look –d dbxxxxxx –e -v empl_v1.")
13
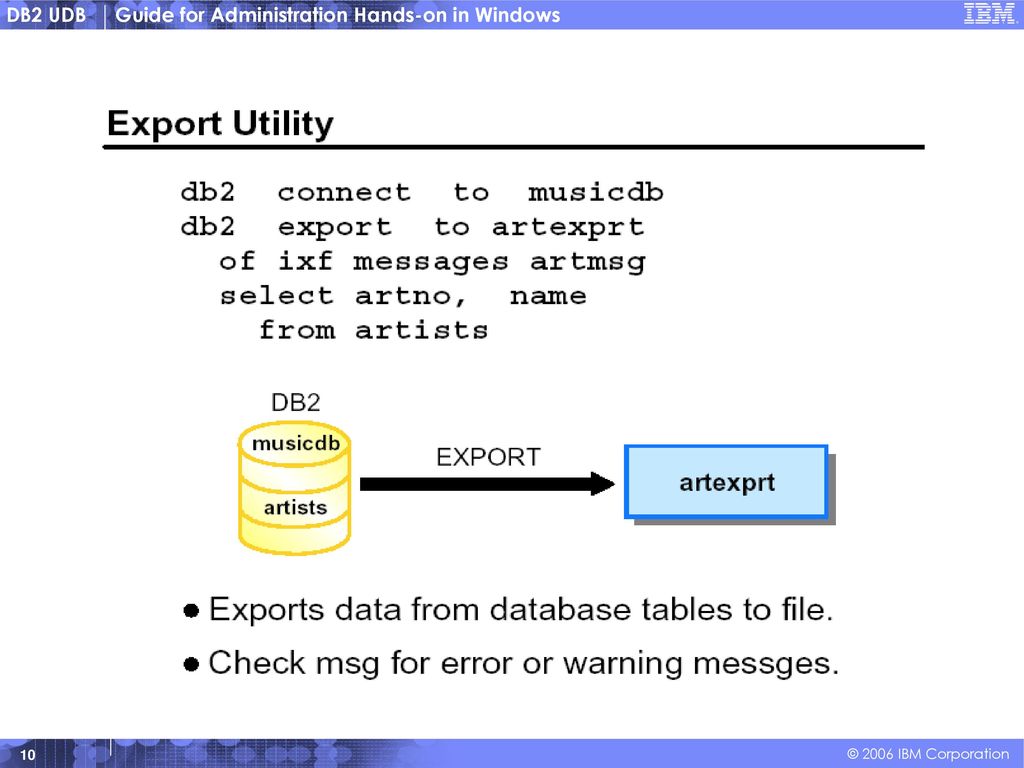
1. dbxxxxxx에 접속하십시오. db2 connect to dbxxxxxx 2. DEL 형식의 파일인 x1.del, x2.del을 생성하십시오. 데이터는 2건입니다. db2 "export to x1.del of del select * from empl" db2 "export to x2.del of del modified by coldel! select * from empl" 3. WSF 형식의 파일 x3.wsf를 생성하십시오. 데이터는 2건입니다. db2 "export to x3.wsf of wsf messages x3.msgs select * from empl" 4. IXF 형식의 파일 x4.ixf, x5.ixf를 생성하십시오. 데이터는 2건입니다. db2 "export to x4.ixf of ixf select * from empl where id < 100" db2 "export to x5.ixf of ixf method N (c1,c2,c3,c4,c5,c6,c7,c8) select * from empl where id < 100" 5. 조인을 이용하여 IXF 형식의 파일인 x6.ixf를 생성하십시오. 데이터는 2건입니다. db2 "export to x6.ixf of ixf select e.id, e.name, d.name from empl e, dept d where e.mydept = d.id" 6. 데이터베이스 sample 에 접속하여 IXF 형식의 파일인 x7.ixf과 DEL 형식의 파일인 x8.del을 생성하십시오. db2 connect to sample mkdir C:\educ\mylob db2 "export to x7.ixf of ixf select * from emp_photo where empno ='zzzzzz’" db2 "export to x8.del of del lobs to C:\educ\mylob\ modified by lobsinfile select * from emp_photo"
 select * from empl where id < 조인을 이용하여 IXF 형식의 파일인 x6.ixf를 생성하십시오. 데이터는 2건입니다. db2 export to x6.ixf of ixf select e.id, e.name, d.name from empl e, dept d where e.mydept = d.id 6. 데이터베이스 sample 에 접속하여 IXF 형식의 파일인 x7.ixf과 DEL 형식의 파일인 x8.del을 생성하십시오. db2 connect to sample. mkdir C:\educ\mylob. db2 export to x7.ixf of ixf select * from emp_photo where empno = zzzzzz’ db2 export to x8.del of del lobs to C:\educ\mylob\ modified by lobsinfile select * from emp_photo")
14
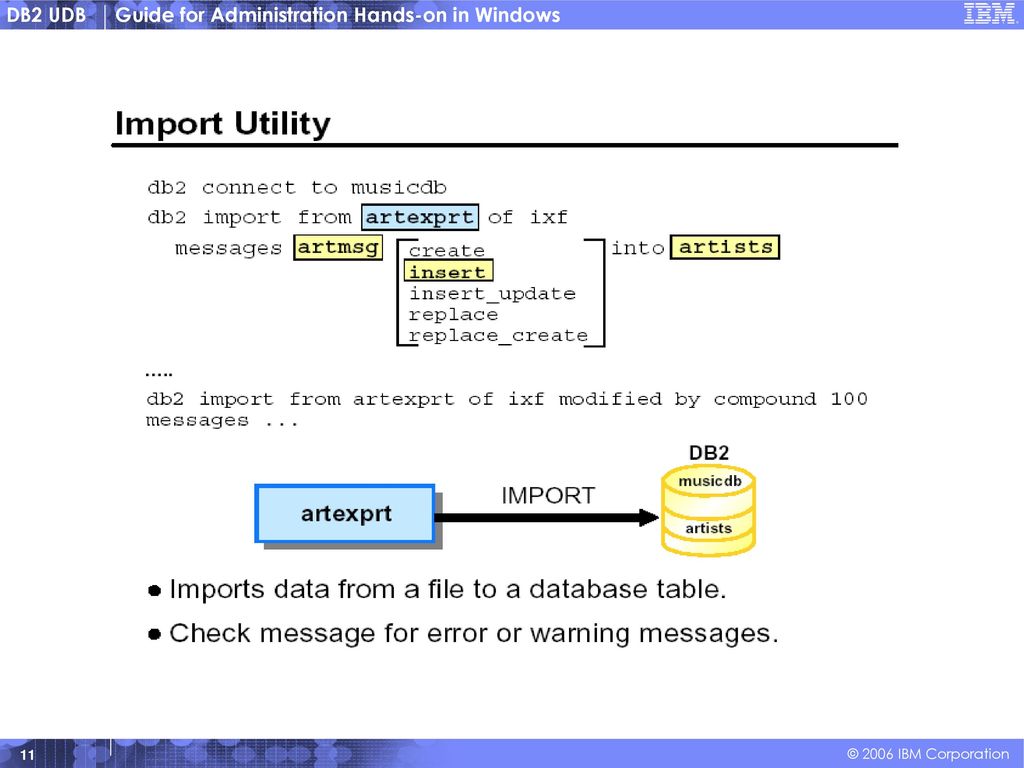
1. dbxxxxxx에 접속하십시오. db2 connect to dbxxxxxx 2. IXF 형식의 파일인 x5.ixf 를 이용하여 empl2 테이블을 생성하십시오. empl2 테이블의 컬럼명과 데이터가 2건인 것을 확인하십시오. db2 "import from x5.ixf of ixf method N (c1,c2,c3,c6,c5,c4,c7,c8) replace_create into empl2" db2 "select * from empl2" 3. IXF 형식의 파일인 x4.ixf를 이용하여 empl2 테이블을 다시 생성하십시오. 데이터가 2건인 것을 확인하십시오. db2 drop table empl2 db2 "import from x4.ixf of ixf create into empl2" 4. DEL 형식의 파일인 x1.del을 이용하여 empl2 테이블에 데이터를 추가하십시오. 데이터는 4건이며, C4와 C6의 값을 주의해서 확인하십시오. db2 "import from x1.del of del messages x1.msgs insert into empl2" 5. DEL 형식의 파일인 x1.del을 이용하여 empl2 테이블에 데이터를 다시 추가하십시오. 데이터는 6건이며, C4와 C6의 값을 주의해서 확인하십시오. db2 "import from x1.del of del method P (1,2,3,6,5,4,7,8) messages x1.msgs insert into empl2" 6. DEL 형식의 파일인 x2.del 을 이용하여 empl2 테이블에 데이터를 대체하십시오. 데이터는 1건입니다. db2 "import from x2.del of del modified by coldel! restartcount 1 replace into empl2" 7. WSF 형식의 파일인 x3.wsf 를 이용하여 empl2 테이블에 데이터를 추가하십시오. empl2의 데이터는 3건입니다. db2 "import from x3.wsf of wsf insert into empl2" 8. 데이터 파일인 x9.asc를 다음과 같이 생성하십시오. #은 공백 문자 또는 임의의 문자를 의미합니다. 9. ASC 형식의 파일인 x9.asc 를 이용하여 empl2 테이블의 기존 데이터를 입력 파일의 데이터를 추가하십시오. empl2의 데이터는 5건입니다. db2 "import from x9.asc of asc method L (1 2,3 8,10 10,13 13,14 23,24 26,28 46) insert into empl2" 10. x7.ixf, x8.del을 이용하여 emp_photo2 테이블을 생성하고 데이터를 추가하십시오. db2 "import from x7.ixf of ixf create into emp_photo2" db2 "import from x8.del of del lobs from C:\educ\mylob\ modified by lobsinfile insert into emp_photo2" db2 "select * from emp_photo2"
 replace_create into empl2 db2 select * from empl2 3. IXF 형식의 파일인 x4.ixf를 이용하여 empl2 테이블을 다시 생성하십시오. 데이터가 2건인 것을 확인하십시오. db2 drop table empl2. db2 import from x4.ixf of ixf create into empl2 4. DEL 형식의 파일인 x1.del을 이용하여 empl2 테이블에 데이터를 추가하십시오. 데이터는 4건이며, C4와 C6의 값을 주의해서 확인하십시오. db2 import from x1.del of del messages x1.msgs insert into empl2 5. DEL 형식의 파일인 x1.del을 이용하여 empl2 테이블에 데이터를 다시 추가하십시오. 데이터는 6건이며, C4와 C6의 값을 주의해서 확인하십시오. db2 import from x1.del of del method P (1,2,3,6,5,4,7,8) messages x1.msgs insert into empl2 6. DEL 형식의 파일인 x2.del 을 이용하여 empl2 테이블에 데이터를 대체하십시오. 데이터는 1건입니다. db2 import from x2.del of del modified by coldel! restartcount 1 replace into empl2 7. WSF 형식의 파일인 x3.wsf 를 이용하여 empl2 테이블에 데이터를 추가하십시오. empl2의 데이터는 3건입니다. db2 import from x3.wsf of wsf insert into empl2 8. 데이터 파일인 x9.asc를 다음과 같이 생성하십시오. #은 공백 문자 또는 임의의 문자를 의미합니다. 9. ASC 형식의 파일인 x9.asc 를 이용하여 empl2 테이블의 기존 데이터를 입력 파일의 데이터를 추가하십시오. empl2의 데이터는 5건입니다. db2 import from x9.asc of asc method L (1 2,3 8,10 10,13 13,14 23,24 26,28 46) insert into empl2 10. x7.ixf, x8.del을 이용하여 emp_photo2 테이블을 생성하고 데이터를 추가하십시오. db2 import from x7.ixf of ixf create into emp_photo2 db2 import from x8.del of del lobs from C:\educ\mylob\ modified by lobsinfile insert into emp_photo2 db2 select * from emp_photo2")
15
1. dbxxxxxx에 접속하십시오. db2 connect to dbxxxxxx 2. empl 테이블을 위한 예외 테이블인 emplexcp를 생성하십시오. db2 "create table emplexcp like empl" db2 "alter table emplexcp add column ts timestamp add column msg clob(32k)" 3. 데이터 파일인 x0.dat를 다음과 같이 생성하십시오. vi x0.dat 11,"이문세","M", 1, " ", 100, 11,"김경호","M", 2, " ", 200, 13,"이기찬","M", 1, " ", 300, 14,"김현정","F", 3, " ", 400, 15,"김건모","m" ,2, " ", 500, 16,"제이","F", 1, " ", 120, 17,"양희은","F", 2, " ", "130", 18, ,"M", 2, " ", 140, 19,"신화","M", 4 , " ", 150, "20","엄정화","F", 1, " ", 160, 4. 만약 REPLACE 모드를 이용한다면 백업을 받아두십시오. 백업의 옵션은 로깅 정책에 따라 다릅니다. 지금은 필요하지 않습니다. db2 "backup db dbxxxxxx" 또는 db2 "backup db dbxxxxxx tablespace (ts01_xxxxxx,ts02_xxxxxx,ts03_xxxxxx)" 5. x0.dat를 이용하여 empl 테이블에 데이터를 로드하십시오. db2 "load from x0.dat of del modified by coldel, dumpfile=C:\educ\dump savecount 5 messages x0.msgs insert into empl for exception emplexcp" 6. load할 데이터가 많은 경우에는 load 명령어가 실행되는 동안 다른 세션에서 진행 정도를 확인할 수 있습니다. db2 load query table empl summaryonly 7. load 명령어를 실행한 후, 메시지 파일의 내용을 확인하십시오. 2건 (8,10번째)의 데이터가 load되지 못한 것을 확인하십시오. type x0.msgs 8. dump 파일의 내용을 확인하십시오. 메시지 파일에 기록된 이유로 load 되지 못한 2건의 데이터가 있습니다. type C:\educ\dump\dump*
 3. 데이터 파일인 x0.dat를 다음과 같이 생성하십시오. vi x0.dat. 11, 이문세 , M , 1, , 100, 11, 김경호 , M , 2, , 200, 13, 이기찬 , M , 1, , 300, 14, 김현정 , F , 3, , 400, 15, 김건모 , m ,2, , 500, 16, 제이 , F , 1, , 120, 17, 양희은 , F , 2, , 130 , 18, , M , 2, , 140, 19, 신화 , M , 4 , , 150, 20 , 엄정화 , F , 1, , 160, 4. 만약 REPLACE 모드를 이용한다면 백업을 받아두십시오. 백업의 옵션은 로깅 정책에 따라 다릅니다. 지금은 필요하지 않습니다. db2 backup db dbxxxxxx 또는 db2 backup db dbxxxxxx tablespace (ts01_xxxxxx,ts02_xxxxxx,ts03_xxxxxx) 5. x0.dat를 이용하여 empl 테이블에 데이터를 로드하십시오. db2 load from x0.dat of del modified by coldel, dumpfile=C:\educ\dump savecount 5 messages x0.msgs insert into empl for exception emplexcp 6. load할 데이터가 많은 경우에는 load 명령어가 실행되는 동안 다른 세션에서 진행 정도를 확인할 수 있습니다. db2 load query table empl summaryonly. 7. load 명령어를 실행한 후, 메시지 파일의 내용을 확인하십시오. 2건 (8,10번째)의 데이터가 load되지 못한 것을 확인하십시오. type x0.msgs. 8. dump 파일의 내용을 확인하십시오. 메시지 파일에 기록된 이유로 load 되지 못한 2건의 데이터가 있습니다. type C:\educ\dump\dump*")
16
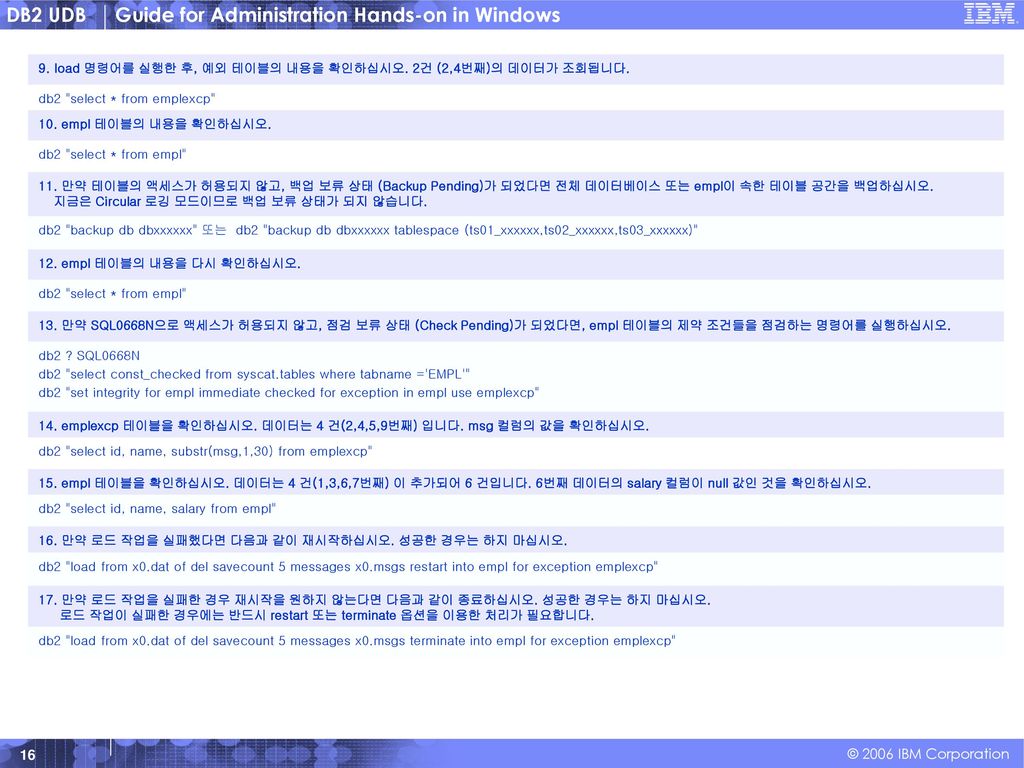
9. load 명령어를 실행한 후, 예외 테이블의 내용을 확인하십시오. 2건 (2,4번째)의 데이터가 조회됩니다.
db2 "select * from emplexcp" 10. empl 테이블의 내용을 확인하십시오. db2 "select * from empl" 11. 만약 테이블의 액세스가 허용되지 않고, 백업 보류 상태 (Backup Pending)가 되었다면 전체 데이터베이스 또는 empl이 속한 테이블 공간을 백업하십시오. 지금은 Circular 로깅 모드이므로 백업 보류 상태가 되지 않습니다. db2 "backup db dbxxxxxx" 또는 db2 "backup db dbxxxxxx tablespace (ts01_xxxxxx,ts02_xxxxxx,ts03_xxxxxx)" 12. empl 테이블의 내용을 다시 확인하십시오. 13. 만약 SQL0668N으로 액세스가 허용되지 않고, 점검 보류 상태 (Check Pending)가 되었다면, empl 테이블의 제약 조건들을 점검하는 명령어를 실행하십시오. db2 ? SQL0668N db2 "select const_checked from syscat.tables where tabname ='EMPL'" db2 "set integrity for empl immediate checked for exception in empl use emplexcp" 14. emplexcp 테이블을 확인하십시오. 데이터는 4 건(2,4,5,9번째) 입니다. msg 컬럼의 값을 확인하십시오. db2 "select id, name, substr(msg,1,30) from emplexcp" 15. empl 테이블을 확인하십시오. 데이터는 4 건(1,3,6,7번째) 이 추가되어 6 건입니다. 6번째 데이터의 salary 컬럼이 null 값인 것을 확인하십시오. db2 "select id, name, salary from empl" 16. 만약 로드 작업을 실패했다면 다음과 같이 재시작하십시오. 성공한 경우는 하지 마십시오. db2 "load from x0.dat of del savecount 5 messages x0.msgs restart into empl for exception emplexcp" 17. 만약 로드 작업을 실패한 경우 재시작을 원하지 않는다면 다음과 같이 종료하십시오. 성공한 경우는 하지 마십시오. 로드 작업이 실패한 경우에는 반드시 restart 또는 terminate 옵션을 이용한 처리가 필요합니다. db2 "load from x0.dat of del savecount 5 messages x0.msgs terminate into empl for exception emplexcp"
가 되었다면 전체 데이터베이스 또는 empl이 속한 테이블 공간을 백업하십시오. 지금은 Circular 로깅 모드이므로 백업 보류 상태가 되지 않습니다. db2 backup db dbxxxxxx 또는 db2 backup db dbxxxxxx tablespace (ts01_xxxxxx,ts02_xxxxxx,ts03_xxxxxx) 12. empl 테이블의 내용을 다시 확인하십시오. 13. 만약 SQL0668N으로 액세스가 허용되지 않고, 점검 보류 상태 (Check Pending)가 되었다면, empl 테이블의 제약 조건들을 점검하는 명령어를 실행하십시오. db2 SQL0668N. db2 select const_checked from syscat.tables where tabname = EMPL db2 set integrity for empl immediate checked for exception in empl use emplexcp 14. emplexcp 테이블을 확인하십시오. 데이터는 4 건(2,4,5,9번째) 입니다. msg 컬럼의 값을 확인하십시오. db2 select id, name, substr(msg,1,30) from emplexcp 15. empl 테이블을 확인하십시오. 데이터는 4 건(1,3,6,7번째) 이 추가되어 6 건입니다. 6번째 데이터의 salary 컬럼이 null 값인 것을 확인하십시오. db2 select id, name, salary from empl 16. 만약 로드 작업을 실패했다면 다음과 같이 재시작하십시오. 성공한 경우는 하지 마십시오. db2 load from x0.dat of del savecount 5 messages x0.msgs restart into empl for exception emplexcp 17. 만약 로드 작업을 실패한 경우 재시작을 원하지 않는다면 다음과 같이 종료하십시오. 성공한 경우는 하지 마십시오. 로드 작업이 실패한 경우에는 반드시 restart 또는 terminate 옵션을 이용한 처리가 필요합니다. db2 load from x0.dat of del savecount 5 messages x0.msgs terminate into empl for exception emplexcp")
23
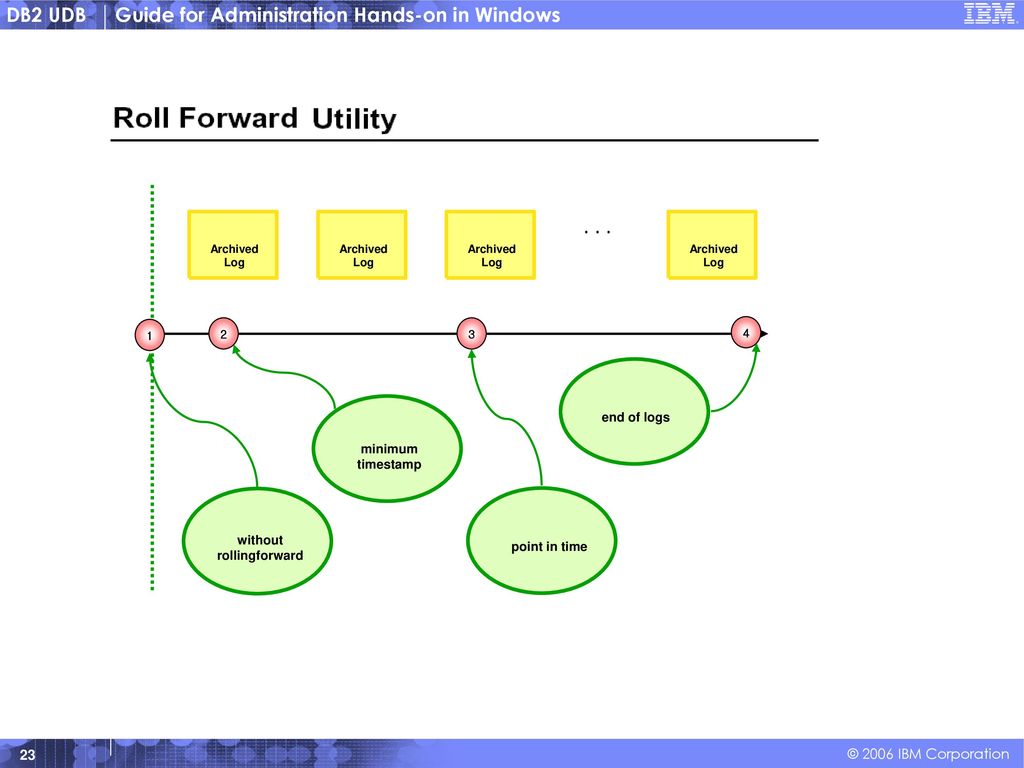
. . . end of logs minimum timestamp without rollingforward
Archived Log . . . 2 3 4 1 without rollingforward minimum timestamp point in time end of logs

25
1. 오프라인 백업을 이용한 리스토어 복구입니다. dbxxxxxx에 접속하십시오.
db2 connect to dbxxxxxx 2. empl 테이블의 데이터 건수를 확인하십시오. db2 "select count(*) from empl" 3. dbxxxxxx를 오프라인 모드로 백업하십시오. 그 백업 이미지 파일을'BACKUP-A'라고 하고, 백업 이미지가 생성된 시간 소인은 :00:00 라고 가정하겠습니다. 백업 이미지 파일 이름에 반영되는 시간 소인은 백업이 시작된 시점입니다. db2 connect reset db2 backup db dbxxxxxx 4.'BACKUP-A'에 대한 정보를 확인하십시오. db2 list backup all for dbxxxxxx 5. dbxxxxxx에 접속하십시오. 6. empl 테이블의 자료를 아래와 같이 삭제하십시오. id 컬럼의 값이 1,2,11인 데이터가 삭제됩니다. db2 "delete from empl where id < 13" 7. empl 테이블의 데이터 건수를 확인하십시오. 3 건의 데이터가 삭제되었으므로 3 건의 데이터가 남게 됩니다. db2 select count(*) from empl 8. 데이터베이스 mydb에 대한 접속을 종료하십시오. 9.'BACKUP-A' 이미지 파일을 이용하여 데이터베이스 mydb 를 복원하십시오. db2 restore db dbxxxxxx 10. mydb에 접속하여 empl 테이블의 데이터 건수가 2번의 실행 결과와 일치하는지 확인하십시오. 11. 데이터베이스 dbxxxxxx에 대한 접속을 종료하십시오.
 from empl 3. dbxxxxxx를 오프라인 모드로 백업하십시오. 그 백업 이미지 파일을 BACKUP-A 라고 하고, 백업 이미지가 생성된 시간 소인은 :00:00 라고 가정하겠습니다. 백업 이미지 파일 이름에 반영되는 시간 소인은 백업이 시작된 시점입니다. db2 connect reset. db2 backup db dbxxxxxx. 4. BACKUP-A 에 대한 정보를 확인하십시오. db2 list backup all for dbxxxxxx. 5. dbxxxxxx에 접속하십시오. 6. empl 테이블의 자료를 아래와 같이 삭제하십시오. id 컬럼의 값이 1,2,11인 데이터가 삭제됩니다. db2 delete from empl where id < empl 테이블의 데이터 건수를 확인하십시오. 3 건의 데이터가 삭제되었으므로 3 건의 데이터가 남게 됩니다. db2 select count(*) from empl. 8. 데이터베이스 mydb에 대한 접속을 종료하십시오. 9. BACKUP-A 이미지 파일을 이용하여 데이터베이스 mydb 를 복원하십시오. db2 restore db dbxxxxxx. 10. mydb에 접속하여 empl 테이블의 데이터 건수가 2번의 실행 결과와 일치하는지 확인하십시오. 11. 데이터베이스 dbxxxxxx에 대한 접속을 종료하십시오.")
26
1. 오프라인 백업을 이용한 롤포워드 복구 과정입니다. 롤포워드 복구를 위해서 아카이브 로깅 정책이 필요합니다
1. 오프라인 백업을 이용한 롤포워드 복구 과정입니다. 롤포워드 복구를 위해서 아카이브 로깅 정책이 필요합니다. dbxxxxxx의 로깅 정책을 아카이브 로깅으로 바꾸십시오. db2 update db cfg for dbxxxxxx using logretain on 2. mydb에 접속하십시오. 아카이브 로깅 정책으로 변경되었으므로 최초의 시작점이 되는 백업본을 생성하기 위해서 데이터베이스에 대한 오프라인 백업이 요구됩니다. db2 connect to dbxxxxxx 3. 백업 보류 상태를 풀기 위해 dbxxxxxx를 오프라인 모드로 전체 백업하십시오. 그 백업 이미지 파일을'BACKUP-B'라고 하고, 그 백업 이미지가 생성된 시간 소인은 :00:00 라고 가정하겠습니다. db2 backup db mydb 4. dbxxxxxx에 접속한 후, empl 테이블의 현재 데이터 건수가 6 건인 것을 확인하고, 시간 소인을 기록하십시오. 이 시점을'TS-A'라고 하고, 현재의 시간 소인을 :20:00 이라고 가정하겠습니다. db2 "select count(*), current timestamp LOCAL, current timestamp – current timezone ISO from empl" 5. 다음과 같이 3 건의 자료를 삭제하십시오. 현재의 데이터가 3 건인 것을 확인하고, 시간 소인을 기록하십시오. 이 시점을'TS-B'라고 하고, 현재의 시간 소인을 :40:00 이라고 가정하겠습니다. db2 "delete from empl where id <13" 6. 오프라인 모드로 dbxxxxxx를 전체 백업하십시오. 그 백업 이미지 파일을'BACKUP-C'라고 하고, 이 백업 이미지가 생성된 시간 소인은 :00:00 이라고 가정하겠습니다. db2 backup db dbxxxxxx 7. 다시 1 건의 자료를 더 삭제하십시오. 현재의 데이터가 2 건인 것을 확인하고, 시간 소인을 기록하십시오. 이 시점을'TS-C'라고 하고, 현재의 시간 소인을 :20:00 이라고 가정하겠습니다. db2 "delete from empl where id <15" 8. 다시 1 건의 자료를 더 삭제하십시오. 현재의 데이터가 1 건인 것을 확인하고, 시간 소인을 기록하십시오. 그 시각을'TS-D'라고 하고, 현재의 시간 소인을 :40:00 이라고 가정하겠습니다. db2 "delete from empl where id <17" 9. 이 시점에서 데이터베이스가 손상되었다고 가정하겠습니다. 6번에서 생성된'BACKUP-C'이미지 파일를 이용하여 dbxxxxxx 데이터베이스를 복원하십시오. taken at 옵션에는 대신에 6번에서 생성된 백업 이미지 파일의 이름에 있는 실제 시간 소인을 이용하십시오. db2 connect reset db2 restore db dbxxxxxx taken at
, current timestamp LOCAL, current timestamp – current timezone ISO from empl 5. 다음과 같이 3 건의 자료를 삭제하십시오. 현재의 데이터가 3 건인 것을 확인하고, 시간 소인을 기록하십시오. 이 시점을 TS-B 라고 하고, 현재의 시간 소인을 :40:00 이라고 가정하겠습니다. db2 delete from empl where id <13 6. 오프라인 모드로 dbxxxxxx를 전체 백업하십시오. 그 백업 이미지 파일을 BACKUP-C 라고 하고, 이 백업 이미지가 생성된 시간 소인은 :00:00 이라고 가정하겠습니다. db2 backup db dbxxxxxx. 7. 다시 1 건의 자료를 더 삭제하십시오. 현재의 데이터가 2 건인 것을 확인하고, 시간 소인을 기록하십시오. 이 시점을 TS-C 라고 하고, 현재의 시간 소인을 :20:00 이라고 가정하겠습니다. db2 delete from empl where id <15 8. 다시 1 건의 자료를 더 삭제하십시오. 현재의 데이터가 1 건인 것을 확인하고, 시간 소인을 기록하십시오. 그 시각을 TS-D 라고 하고, 현재의 시간 소인을 :40:00 이라고 가정하겠습니다. db2 delete from empl where id <17 9. 이 시점에서 데이터베이스가 손상되었다고 가정하겠습니다. 6번에서 생성된 BACKUP-C 이미지 파일를 이용하여 dbxxxxxx 데이터베이스를 복원하십시오. taken at 옵션에는 대신에 6번에서 생성된 백업 이미지 파일의 이름에 있는 실제 시간 소인을 이용하십시오. db2 connect reset. db2 restore db dbxxxxxx taken at")
27
10. dbxxxxxx에 접속하십시오. db2 connect to dbxxxxxx 10. 롤포워드 보류 상태에 걸렸다면 로그 파일을 적용해야 합니다. 이 과정은 아카이브 상태로 보관된 로그 파일들의 일부를 현재 로그 디렉토리에 옮겨 놓은 후에 여러 번 반복하여 원하는 시점까지 반복할 수 있습니다. 데이터베이스를 손상 직전의 시점인 8번의'TS-D'시점까지 복구하기 위하여 최근까지의 로그 파일을 적용하십시오. db2 rollforward db dbxxxxxx to end of logs 11. dbxxxxxx에 다시 접속하십시오. 12. 로그의 적용을 중지한다는 옵션을 사용하지 않았으므로 데이터베이스는 아직도 롤포워드 보류 상태에 걸려있게 됩니다. 더 이상 적용할 로그 파일이 없다면, 로그 파일의 적용을 중지하고 복구를 종료하십시오. db2 rollforward db dbxxxxxx stop 13. dbxxxxxx에 다시 접속하십시오. 14. empl 테이블의 현재 데이터 건수를 확인하십시오. 8번에서 기록한 데이터의 건수와 동일한 1건인 것을 확인하십시오. db2 "select count(*) from empl" 15. 다시'BACKUP-B'이미지 파일을 이용하여 데이터베이스를 복원 후, 'TS-B'시점까지의 로그 파일만 적용하여 empl 테이블의 데이터 건수를 확인하십시오. 5번에서 기록한 데이터의 건수와 동일한 3건이 된 것을 확인하십시오. taken at 옵션에는 3번에서 생성된 백업 이미지 파일의 이름에 있는 실제 시간 소인을 이용하십시오. 롤포워드시 to 옵션에는 5번에서 기록해 둔 LOCAL 또는 ISO 시각을 이용하십시오. db2 connect reset db2 restore db dbxxxxxx taken at db2 rollforward db dbxxxxxx to using local time and stop (또는 db2 rollforward db mydb to and stop ) 16. 다시'BACKUP-B'이미지 파일을 이용하여 데이터베이스를 복원 후, 로그 파일을 전혀 적용하지 않았을 때, empl 테이블의 데이터 건수를 확인하십시오. 4번에서 기록한 데이터의 건수와 동일한 6건인 것을 확인하십시오. taken at 옵션에는 3번에서 생성된 백업 이미지 파일의 이름에 있는 실제 시간 소인을 이용하십시오. db2 restore db dbxxxxxx taken at
 from empl 15. 다시 BACKUP-B 이미지 파일을 이용하여 데이터베이스를 복원 후, TS-B 시점까지의 로그 파일만 적용하여 empl 테이블의 데이터 건수를 확인하십시오. 5번에서 기록한 데이터의 건수와 동일한 3건이 된 것을 확인하십시오. taken at 옵션에는 3번에서 생성된 백업 이미지 파일의 이름에 있는 실제 시간 소인을 이용하십시오. 롤포워드시 to 옵션에는 5번에서 기록해 둔 LOCAL 또는 ISO 시각을 이용하십시오. db2 connect reset. db2 restore db dbxxxxxx taken at db2 rollforward db dbxxxxxx to using local time and stop (또는 db2 rollforward db mydb to and stop ) 16. 다시 BACKUP-B 이미지 파일을 이용하여 데이터베이스를 복원 후, 로그 파일을 전혀 적용하지 않았을 때, empl 테이블의 데이터 건수를 확인하십시오. 4번에서 기록한 데이터의 건수와 동일한 6건인 것을 확인하십시오. taken at 옵션에는 3번에서 생성된 백업 이미지 파일의 이름에 있는 실제 시간 소인을 이용하십시오. db2 restore db dbxxxxxx taken at")
Similar presentations

 서비스 사업부 / 기술지원팀. 목차 구조 일반적 특징 객체지향 특징 ORDB 개념을 이용한 스키마 ORDB 개념을 이용한 질의.>")


.>")


