Download presentation
Presentation is loading. Please wait.

1
CG Programming (Modeling)
Fall, 2014

2
What is GLUI? OpenGL User Interface Library(GLUI)
a GLUT-based C++ user interface library which provides controls such as buttons, checkboxes, radio buttons, and spinners to OpenGL applications. It is window-system independent, relying on GLUT to handle all system-dependent issues, such as window and mouse management.

3
What is GLUI? Features of the GLUI
Complete integration with GLUT toolkit Simple creation of a new user interface window with a single line of code Support for multiple user interface windows Standard user interface controls such as: Buttons , Checkboxes, Radio Buttons, Editable text boxes Spinners, Static text fields, Panels Separator lines Controls can generate callbacks when their values change

4
What does GLUI look like?

5
Installing GLUI using VC++ on windows
To install the glui, the glut must be installed first Download glui library from Under src directory u will find msvc directory, then open glui.sln file. Convert the solution (if needed) Converting the project solution into VC++ project Select the _glui library and build the library After building the library, the lib file (glui32d.lib), glui32d.lib – ‘d’ for debug, will be stored in the msvc\lib directory Put the glui32.lib file into C:\Program Files\Microsoft Visual Studio 10.0\VC\lib directory Put the glui.h file into C:\Program Files\Microsoft Visual Studio 10.0\VC\include\GL directory
 Converting the project solution into VC++ project. Select the _glui library and build the library. After building the library, the lib file (glui32d.lib), glui32d.lib – ‘d’ for debug, will be stored in the msvc\lib directory. Put the glui32.lib file into C:\Program Files\Microsoft Visual Studio 10.0\VC\lib directory. Put the glui.h file into C:\Program Files\Microsoft Visual Studio 10.0\VC\include\GL directory.")
6
Setup GLUI Setup GLUI http://sourceforge.net/projects/glui/
Download GLUI : glui-2.36.zip Copy header (glui.h) C:\Program Files\Microsoft Visual Studio 10.0\VC\Include\GL Copy lib (glui32.lib) C:\Program Files\Microsoft Visual Studio 10.0\VC\lib Test Examples
 C:\Program Files\Microsoft Visual Studio 10.0\VC\Include\GL. Copy lib (glui32.lib) C:\Program Files\Microsoft Visual Studio 10.0\VC\lib. Test Examples.")
7
For VS 2010 Link Error fatal error LNK1123: failure during conversion to COFF: file invalid or corrupt This issue occurred after Visual Studio 2012 installation Solution 1 프로젝트 속성에서 Manifest Tool > Input and Output > Embed Manifest 의 설정을 No 로 바꿔주면 된다. Solution 2 아래 링크를 통해서 Visual Studio 2010 ServicePack 1을 설치하면 된다.

8
For VS 2010

9
List of Controls List of Controls

10
List of Controls

11
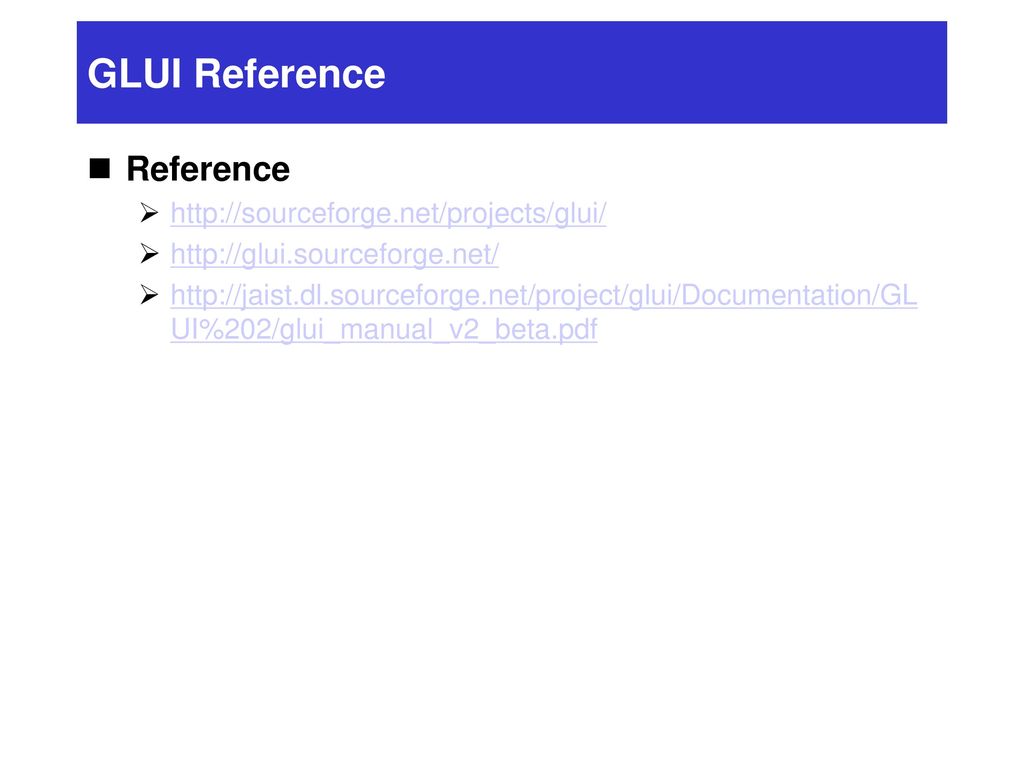
GLUI Reference Reference http://sourceforge.net/projects/glui/
12
GLUT Main() int main(int argc, char **argv) { glutInit(&argc, argv);
glutInitWindowSize(800,600); glutInitWindowPosition(100,100); // 더블 버퍼 사용(화면 버퍼와 백버퍼), RGB칼라모델, 깊이버퍼 사용 glutInitDisplayMode(GLUT_DOUBLE | GLUT_RGB | GLUT_DEPTH); glutCreateWindow("Simple Modeling"); // display(): Rendering Loop 에서 계속 불림 glutDisplayFunc(display); // reshape(): 윈도우 크기변화 이벤트 처리 GLUI_Master.set_glutReshapeFunc(reshape); // keyboard(): 키보드 이벤트 처리 GLUI_Master.set_glutKeyboardFunc(keyboard); // mouse(): 마우스 이벤트 처리 GLUI_Master.set_glutMouseFunc(mouse); // motion(): 포인트 위치(x, y) 움직임 이벤트 처리 (절대 좌표) glutMotionFunc(motion); // ReadModel(): 파일로부터 물체를 읽어드리는 함수 ReadModel(); // GLSetupRC(): OpenGL를 사용하여 빛설정, 시각좌표계설정, 프로젝션 설정 GLSetupRC(); // setupGLUI(): GLUI를 사용하여 UI 설정 setupGLUI (); glutMainLoop(); return 0; /* ANSI C requires main to return int. */ }
; glutInitWindowPosition(100,100); // 더블 버퍼 사용(화면 버퍼와 백버퍼), RGB칼라모델, 깊이버퍼 사용. glutInitDisplayMode(GLUT_DOUBLE | GLUT_RGB | GLUT_DEPTH); glutCreateWindow( Simple Modeling ); // display(): Rendering Loop 에서 계속 불림. glutDisplayFunc(display); // reshape(): 윈도우 크기변화 이벤트 처리. GLUI_Master.set_glutReshapeFunc(reshape); // keyboard(): 키보드 이벤트 처리. GLUI_Master.set_glutKeyboardFunc(keyboard); // mouse(): 마우스 이벤트 처리. GLUI_Master.set_glutMouseFunc(mouse); // motion(): 포인트 위치(x, y) 움직임 이벤트 처리 (절대 좌표) glutMotionFunc(motion); // ReadModel(): 파일로부터 물체를 읽어드리는 함수. ReadModel(); // GLSetupRC(): OpenGL를 사용하여 빛설정, 시각좌표계설정, 프로젝션 설정. GLSetupRC(); // setupGLUI(): GLUI를 사용하여 UI 설정. setupGLUI (); glutMainLoop(); return 0; /* ANSI C requires main to return int. */ }")
13
GLUT 이벤트 처리 키보드 이벤트 마우스 이벤트 포인트 움직임 이벤트
void keyboard(unsigned char key, int x, int y) key 변수: 눌려진 문자 값 x, y 변수: 포인트 위치 마우스 이벤트 void mouse(int button, int state, int x, int y) button 변수: GLUT_LEFT_BUTTON, GLUT_RIGHT_BUTTON, GLUT_MIDDLE_BUTTON state 변수: GLUT_UP, GLUT_DOWN x, y 변수: window-relative mouse position 포인트 움직임 이벤트 void motion(int x, int y)
 key 변수: 눌려진 문자 값. x, y 변수: 포인트 위치. 마우스 이벤트. void mouse(int button, int state, int x, int y) button 변수: GLUT_LEFT_BUTTON, GLUT_RIGHT_BUTTON, GLUT_MIDDLE_BUTTON. state 변수: GLUT_UP, GLUT_DOWN. x, y 변수: window-relative mouse position. 포인트 움직임 이벤트. void motion(int x, int y)")
14
OpenGL 환경 설정 관련 함수 void GLSetupRC(void)
{ /* Enable a single OpenGL light. */ // LIGHT0 : 설정한 조명의 이름, GL_LIGHT1, GL_LIGHT2, … 로 조명 추가 가능 glLightfv(GL_LIGHT0, GL_DIFFUSE, light_diffuse); // 난반사 설정 glLightfv(GL_LIGHT0, GL_POSITION, light_specular); // 정반사 설정 glLightfv(GL_LIGHT0, GL_POSITION, light_ambient); // 주변광 설정 glLightfv(GL_LIGHT0, GL_POSITION, light_position); // 조명의 위치 설정 glEnable(GL_LIGHT0); // 설정한 LIGHT0를 사용 가능 glEnable(GL_LIGHTING); // 설정한 조명들을 켬 glDisable(…): 조명들을 끔 /* Use depth buffering for hidden surface elimination. */ glEnable(GL_DEPTH_TEST); // 깊이 테스트 켬 /* Setup the view */ glMatrixMode(GL_PROJECTION); // 프로젝션 설정 glLoadIdentity(); // 프로젝션 행렬 초기화 단위 행렬로 대치 gluPerspective( 40.0, // field of view in degree 1.0, // aspect ratio 1.0, // Z near 2000.0); // Z far glMatrixMode(GL_MODELVIEW); // 시각좌표계 UVN 설정 glLoadIdentity(); gluLookAt(400.0, 400.0, 400.0, // eye is at (400,400,400) 0.0, 0.0, 0.0, // center is at (0,0,0) 0.0, 1.0, 0.); // up is in positive Y direction }
; // 난반사 설정. glLightfv(GL_LIGHT0, GL_POSITION, light_specular); // 정반사 설정. glLightfv(GL_LIGHT0, GL_POSITION, light_ambient); // 주변광 설정. glLightfv(GL_LIGHT0, GL_POSITION, light_position); // 조명의 위치 설정. glEnable(GL_LIGHT0); // 설정한 LIGHT0를 사용 가능. glEnable(GL_LIGHTING); // 설정한 조명들을 켬 glDisable(…): 조명들을 끔. /* Use depth buffering for hidden surface elimination. */ glEnable(GL_DEPTH_TEST); // 깊이 테스트 켬. /* Setup the view */ glMatrixMode(GL_PROJECTION); // 프로젝션 설정. glLoadIdentity(); // 프로젝션 행렬 초기화 단위 행렬로 대치. gluPerspective( 40.0, // field of view in degree. 1.0, // aspect ratio. 1.0, // Z near ); // Z far. glMatrixMode(GL_MODELVIEW); // 시각좌표계 UVN 설정. glLoadIdentity(); gluLookAt(400.0, 400.0, 400.0, // eye is at (400,400,400) 0.0, 0.0, 0.0, // center is at (0,0,0) 0.0, 1.0, 0.); // up is in positive Y direction. }")
15
GLUI 사용자 인터페이스 설정 void setupGLUI() { printf( "GLUI version: %3.2f\n", GLUI_Master.get_version() ); glui = GLUI_Master.create_glui_subwindow( main_window, GLUI_SUBWINDOW_RIGHT ); // Add the 'Object Properties' Panel to the GLUI window obj_panel = new GLUI_Panel( glui, "Object Properties" ); // Add the Wireframe Check box to the 'Object Properties' Panel obj_shade = new GLUI_Checkbox( obj_panel, "Shading", &status, 1, control_cb ); // Add the Culling Check box to the 'Object Properties' Panel obj_cull = new GLUI_Checkbox( obj_panel, "Cull On/Off", &cull, 2, control_cb ); // Add the lighting Check box to the 'Object Properties' Panel obj_light = new GLUI_Checkbox( obj_panel, "Light On/Off", &light, 3, control_cb ); // Add a separator new GLUI_Separator( obj_panel ); // Add a light color scroll GLUI_Panel *light0 = new GLUI_Rollout( obj_panel, "Light" , false); GLUI_Scrollbar *sb; sb = new GLUI_Scrollbar( light0, "Red",GLUI_SCROLL_HORIZONTAL, &light_diffuse[0], 4,control_cb); sb->set_float_limits(0,1); sb = new GLUI_Scrollbar( light0, "Green",GLUI_SCROLL_HORIZONTAL, &light_diffuse[1], 4,control_cb); sb = new GLUI_Scrollbar( light0, "Blue",GLUI_SCROLL_HORIZONTAL, &light_diffuse[2], 4,control_cb);
 { printf( GLUI version: %3.2f\n , GLUI_Master.get_version() ); glui = GLUI_Master.create_glui_subwindow( main_window, GLUI_SUBWINDOW_RIGHT ); // Add the Object Properties Panel to the GLUI window obj_panel = new GLUI_Panel( glui, Object Properties ); // Add the Wireframe Check box to the Object Properties Panel obj_shade = new GLUI_Checkbox( obj_panel, Shading , &status, 1, control_cb ); // Add the Culling Check box to the Object Properties Panel obj_cull = new GLUI_Checkbox( obj_panel, Cull On/Off , &cull, 2, control_cb ); // Add the lighting Check box to the Object Properties Panel obj_light = new GLUI_Checkbox( obj_panel, Light On/Off , &light, 3, control_cb ); // Add a separator new GLUI_Separator( obj_panel ); // Add a light color scroll GLUI_Panel *light0 = new GLUI_Rollout( obj_panel, Light , false); GLUI_Scrollbar *sb; sb = new GLUI_Scrollbar( light0, Red ,GLUI_SCROLL_HORIZONTAL, &light_diffuse[0], 4,control_cb); sb->set_float_limits(0,1); sb = new GLUI_Scrollbar( light0, Green ,GLUI_SCROLL_HORIZONTAL, &light_diffuse[1], 4,control_cb); sb = new GLUI_Scrollbar( light0, Blue ,GLUI_SCROLL_HORIZONTAL, &light_diffuse[2], 4,control_cb);")
16
GLUI 사용자 인터페이스 설정 // Add the 'Object Type' Panel to the GLUI window GLUI_Rollout *obj_rollout = new GLUI_Rollout(glui, "Object Type"); // Create radio button group obj_group = new GLUI_RadioGroup (obj_rollout, &type, 5, control_cb); // Add the radio buttons to the radio group (Load Model) new GLUI_RadioButton ( obj_group, "Cube" ); new GLUI_RadioButton ( obj_group, "Sphere" ); new GLUI_RadioButton ( obj_group, "Teapot" ); new GLUI_RadioButton ( obj_group, "SOR" ); // Add the 'Transformation' Panel to the GLUI window GLUI_Panel *transformation_panel = new GLUI_Panel(glui, "Transformation"); // Create transformation panel 1 that will contain the Translation controls GLUI_Panel *transformation_panel1 = new GLUI_Panel(transformation_panel, "Translate"); // Add the xy translation control GLUI_Translation *translation_xy = new GLUI_Translation (transformation_panel1, "XY", GLUI_TRANSLATION_XY, trans_xy, 6, control_cb ); // Set the translation speed translation_xy->set_speed( 1 ); // Add column glui->add_column_to_panel (transformation_panel1, true); // Add the z translation control GLUI_Translation *translation_z = new GLUI_Translation (transformation_panel1, "Z", GLUI_TRANSLATION_Z, &trans_z, 6, control_cb ); translation_z->set_speed( 1 );
; // Create radio button group obj_group = new GLUI_RadioGroup (obj_rollout, &type, 5, control_cb); // Add the radio buttons to the radio group (Load Model) new GLUI_RadioButton ( obj_group, Cube ); new GLUI_RadioButton ( obj_group, Sphere ); new GLUI_RadioButton ( obj_group, Teapot ); new GLUI_RadioButton ( obj_group, SOR ); // Add the Transformation Panel to the GLUI window GLUI_Panel *transformation_panel = new GLUI_Panel(glui, Transformation ); // Create transformation panel 1 that will contain the Translation controls GLUI_Panel *transformation_panel1 = new GLUI_Panel(transformation_panel, Translate ); // Add the xy translation control GLUI_Translation *translation_xy = new GLUI_Translation (transformation_panel1, XY , GLUI_TRANSLATION_XY, trans_xy, 6, control_cb ); // Set the translation speed translation_xy->set_speed( 1 ); // Add column glui->add_column_to_panel (transformation_panel1, true); // Add the z translation control GLUI_Translation *translation_z = new GLUI_Translation (transformation_panel1, Z , GLUI_TRANSLATION_Z, &trans_z, 6, control_cb ); translation_z->set_speed( 1 );")
17
GLUI 사용자 인터페이스 설정 // Add the rotation control
GLUI_Panel *transformation_panel2 = new GLUI_Panel(transformation_panel, "Rotate & Scale"); GLUI_Rotation *rotation = new GLUI_Rotation (transformation_panel2, "Rotate", rotation_matrix, 7, control_cb); // Add separator glui->add_separator_to_panel (transformation_panel2); // Add the scale spinner GLUI_Spinner *spinner = new GLUI_Spinner (transformation_panel2, "Scale", GLUI_SPINNER_FLOAT, &scalefactor, 8, control_cb); // Set the limits for the spinner spinner->set_float_limits ( -4.0, 4.0 ); // Add the Quit Button glui->add_button ("Quit", 9, control_cb); // set main window with GLUI glui->set_main_gfx_window( main_window ); }
; GLUI_Rotation *rotation = new GLUI_Rotation (transformation_panel2, Rotate , rotation_matrix, 7, control_cb); // Add separator. glui->add_separator_to_panel (transformation_panel2); // Add the scale spinner. GLUI_Spinner *spinner = new GLUI_Spinner (transformation_panel2, Scale , GLUI_SPINNER_FLOAT, &scalefactor, 8, control_cb); // Set the limits for the spinner. spinner->set_float_limits ( -4.0, 4.0 ); // Add the Quit Button. glui->add_button ( Quit , 9, control_cb); // set main window with GLUI. glui->set_main_gfx_window( main_window ); }")
18
GLUI 사용자 인터페이스 설정 void control_cb( int control ) { if (control==4) { // light color scroll control glLightfv(GL_LIGHT0, GL_DIFFUSE, light_diffuse); } if (control==5) { // object type radio button control switch (type) { case 0: fname="cube.dat"; ReadModel(); glutPostRedisplay(); break; ……………… if (control==6) { // xyz translation control xloc=trans_xy[0]; yloc=trans_xy[1]; zloc=trans_z; if (control==9) { // Quit Button control printf ("Quit Button clicked... Exit!\n"); exit (1);
 { if (control==4) { // light color scroll control glLightfv(GL_LIGHT0, GL_DIFFUSE, light_diffuse); } if (control==5) { // object type radio button control switch (type) { case 0: fname= cube.dat ; ReadModel(); glutPostRedisplay(); break; ……………… if (control==6) { // xyz translation control xloc=trans_xy[0]; yloc=trans_xy[1]; zloc=trans_z; if (control==9) { // Quit Button control printf ( Quit Button clicked... Exit!\n ); exit (1);")
19
GLUT Display 함수 void display(void) {
glClear(GL_COLOR_BUFFER_BIT | GL_DEPTH_BUFFER_BIT); MakeGL_Model(); // 물체 모델링 if (status==WIRE) DrawWire(); // 물체 렌더링 (선구조형상) else DrawShade(); // 물체 렌더링 (쉐이딩) }
; MakeGL_Model(); // 물체 모델링. if (status==WIRE) DrawWire(); // 물체 렌더링 (선구조형상) else DrawShade(); // 물체 렌더링 (쉐이딩) }")
20
Read File(모델링 파일) Cube.dat void ReadModel() { FILE *f1; char s[81];
int i; if ((f1 = fopen(fname, "rt"))== NULL) { printf("No file\n"); exit(0); } fscanf(f1,"%s",s); printf( "%s", s ); // 문자열 “VERTEX”읽음 fscanf(f1,"%s",s); printf( "%s", s ); // 문자열 “=“ 읽음 fscanf(f1,"%d",&pnum); printf( "%d\n", pnum); // 버텍스의 개수 읽음 mpoint = (Point*)malloc(sizeof(Point)*pnum); // 버텍스 개수 만큼 POINT배열 설정 for (i=0; i<pnum; i++){ fscanf(f1,"%f",&mpoint[i].x); // 버텍스 읽음 (x좌표) fscanf(f1,"%f",&mpoint[i].y); // 버텍스 읽음 (y좌표) fscanf(f1,"%f",&mpoint[i].z); // 버텍스 읽음 (z좌표) printf( "%f %f %f\n", mpoint[i].x, mpoint[i].y,mpoint[i].z); } fscanf(f1,"%s",s); printf( "%s", s ); // 문자열 “FACE”읽음 fscanf(f1,"%s",s); printf( "%s", s ); // 문자열 “=”읽음 fscanf(f1,"%d",&fnum); printf( "%d\n", fnum); // 면의 개수 읽음 mface = (Face*)malloc(sizeof(Face)*fnum); // 면 개수 만큼 FACE배열 설정 for (i=0; i<fnum; i++){ fscanf(f1,"%d",&mface[i].ip[0]); // 1번째 점의 인덱스 읽음 fscanf(f1,"%d",&mface[i].ip[1]); // 2번째 점의 인덱스 읽음 fscanf(f1,"%d",&mface[i].ip[2]); // 3번째 점의 인덱스 읽음 printf("%d %d %d\n", mface[i].ip[0], mface[i].ip[1], mface[i].ip[2]); fclose(f1); VERTEX = 8 FACE = 12 7 5 6 7 4 5 3 2 1 3 1 0 2 6 5 2 5 1 3 7 6 3 6 2 0 4 7 0 7 3 1 5 4 1 4 0 Cube.dat
![Read File(모델링 파일) Cube.dat void ReadModel() { FILE *f1; char s[81];](http://slidesplayer.org/slide/12964413/79/images/20/Read+File%28%EB%AA%A8%EB%8D%B8%EB%A7%81+%ED%8C%8C%EC%9D%BC%29+Cube.dat+void+ReadModel%28%29+%7B+FILE+%2Af1%3B+char+s%5B81%5D%3B.jpg "int i; if ((f1 = fopen(fname, rt ))== NULL) { printf( No file\n ); exit(0); } fscanf(f1, %s ,s); printf( %s , s ); // 문자열 VERTEX 읽음. fscanf(f1, %s ,s); printf( %s , s ); // 문자열 = 읽음. fscanf(f1, %d ,&pnum); printf( %d\n , pnum); // 버텍스의 개수 읽음. mpoint = (Point*)malloc(sizeof(Point)*pnum); // 버텍스 개수 만큼 POINT배열 설정. for (i=0; i<pnum; i++){ fscanf(f1, %f ,&mpoint[i].x); // 버텍스 읽음 (x좌표) fscanf(f1, %f ,&mpoint[i].y); // 버텍스 읽음 (y좌표) fscanf(f1, %f ,&mpoint[i].z); // 버텍스 읽음 (z좌표) printf( %f %f %f\n , mpoint[i].x, mpoint[i].y,mpoint[i].z); } fscanf(f1, %s ,s); printf( %s , s ); // 문자열 FACE 읽음. fscanf(f1, %s ,s); printf( %s , s ); // 문자열 = 읽음. fscanf(f1, %d ,&fnum); printf( %d\n , fnum); // 면의 개수 읽음. mface = (Face*)malloc(sizeof(Face)*fnum); // 면 개수 만큼 FACE배열 설정. for (i=0; i<fnum; i++){ fscanf(f1, %d ,&mface[i].ip[0]); // 1번째 점의 인덱스 읽음. fscanf(f1, %d ,&mface[i].ip[1]); // 2번째 점의 인덱스 읽음. fscanf(f1, %d ,&mface[i].ip[2]); // 3번째 점의 인덱스 읽음. printf( %d %d %d\n , mface[i].ip[0], mface[i].ip[1], mface[i].ip[2]); fclose(f1); VERTEX = FACE = Cube.dat.")
21
OpenGL Modeling PushMatrix PopMatrix void MakeGL_Model(void) { int i;
Point norm; // 폴리건의 노말 벡터 glShadeModel(GL_SMOOTH); // Gouraud 쉐이딩 // GL_FLAT Constant 쉐이딩 if (glIsList(1)) glDeleteLists(1,1); // 모델 리스트 설정 glNewList(1, GL_COMPILE); glPushMatrix(); // 행렬 스택에 푸쉬 glTranslatef(xloc, yloc, zloc); // 물체 이동 변환 glMultMatrixf (rotation_matrix); // 물체 회전 변환 행렬 glRotatef(angle, 0.0, 1.0, 0.0); // 물체 회전 변환 glScalef(scalefactor, scalefactor, scalefactor); // 물체 크기 변환 for (i = 0; i < fnum; i++) { norm = cnormal(mp[mf[i].ip[2]], mp[mf[i].ip[1]], mp[mf[i].ip[0]]); // 면 노말 계산 glBegin(GL_TRIANGLES); // 삼각형으로 면 생성 glNormal3f(norm.x, norm.y, norm.z); // 면 노말 설정 glVertex3f(mp[mf[i].ip[0]].x, mp[mf[i].ip[0]].y, mp[mf[i].ip[0]].z); // 1번째 점 설정 glVertex3f(mp[mf[i].ip[1]].x, mp[mf[i].ip[1]].y, mp[mf[i].ip[1]].z); // 2번째 점 설정 glVertex3f(mp[mf[i].ip[2]].x, mp[mf[i].ip[2]].y, mp[mf[i].ip[2]].z); // 3번째 점 설정 glEnd(); } glPopMatrix(); // 행렬 스택에서 팝 glEndList();
; // Gouraud 쉐이딩. // GL_FLAT Constant 쉐이딩. if (glIsList(1)) glDeleteLists(1,1); // 모델 리스트 설정. glNewList(1, GL_COMPILE); glPushMatrix(); // 행렬 스택에 푸쉬. glTranslatef(xloc, yloc, zloc); // 물체 이동 변환. glMultMatrixf (rotation_matrix); // 물체 회전 변환 행렬. glRotatef(angle, 0.0, 1.0, 0.0); // 물체 회전 변환. glScalef(scalefactor, scalefactor, scalefactor); // 물체 크기 변환. for (i = 0; i < fnum; i++) { norm = cnormal(mp[mf[i].ip[2]], mp[mf[i].ip[1]], mp[mf[i].ip[0]]); // 면 노말 계산. glBegin(GL_TRIANGLES); // 삼각형으로 면 생성. glNormal3f(norm.x, norm.y, norm.z); // 면 노말 설정. glVertex3f(mp[mf[i].ip[0]].x, mp[mf[i].ip[0]].y, mp[mf[i].ip[0]].z); // 1번째 점 설정. glVertex3f(mp[mf[i].ip[1]].x, mp[mf[i].ip[1]].y, mp[mf[i].ip[1]].z); // 2번째 점 설정. glVertex3f(mp[mf[i].ip[2]].x, mp[mf[i].ip[2]].y, mp[mf[i].ip[2]].z); // 3번째 점 설정. glEnd(); } glPopMatrix(); // 행렬 스택에서 팝. glEndList();")
22
SOR Model void MakeSORModel() { int i; int IncAngle=10 // 회전 증가 변수 (10도씩 회전) pnum=(360/IncAngle)*2; // 점의 개수 mpoint = (Point*)malloc(sizeof(Point)*pnum); // 점의 개수 할당 mpoint[0].x=100; mpoint[0].y=-100; mpoint[0].z=100; // 첫번째 점의 초기 위치 mpoint[1].x=100; mpoint[1].y=100; mpoint[1].z=100; // 두번째 점의 초기 위치 for (i=0; i<pnum-2; i++){ // 회전에 의한 점 위치 계산 mpoint[i+2].x= cos(IncAngle*PI/180)*mpoint[i].x-sin(IncAngle*PI/180)*mpoint[i].z; mpoint[i+2].y= mpoint[i].y; mpoint[i+2].z= sin(IncAngle*PI/180)*mpoint[i].x+cos(IncAngle*PI/180)*mpoint[i].z; } fnum=2*360/IncAngle; // 면의 개수 mface = (Face*)malloc(sizeof(Face)*fnum); // 면의 개수 할당 for (i=0; i<pnum; i+=2) { // 계산된 점들로 면 구성 mface[i].ip[0]=i%pnum; mface[i].ip[1]=(i+1)%pnum; mface[i].ip[2]=(i+1+2)%pnum; mface[i+1].ip[0]=i%pnum; mface[i+1].ip[1]=(i+1+2)%pnum; mface[i+1].ip[2]=(i+2)%pnum;
 { int i; int IncAngle=10 // 회전 증가 변수 (10도씩 회전) pnum=(360/IncAngle)*2; // 점의 개수 mpoint = (Point*)malloc(sizeof(Point)*pnum); // 점의 개수 할당 mpoint[0].x=100; mpoint[0].y=-100; mpoint[0].z=100; // 첫번째 점의 초기 위치 mpoint[1].x=100; mpoint[1].y=100; mpoint[1].z=100; // 두번째 점의 초기 위치 for (i=0; i<pnum-2; i++){ // 회전에 의한 점 위치 계산 mpoint[i+2].x= cos(IncAngle*PI/180)*mpoint[i].x-sin(IncAngle*PI/180)*mpoint[i].z; mpoint[i+2].y= mpoint[i].y; mpoint[i+2].z= sin(IncAngle*PI/180)*mpoint[i].x+cos(IncAngle*PI/180)*mpoint[i].z; } fnum=2*360/IncAngle; // 면의 개수 mface = (Face*)malloc(sizeof(Face)*fnum); // 면의 개수 할당 for (i=0; i<pnum; i+=2) { // 계산된 점들로 면 구성 mface[i].ip[0]=i%pnum; mface[i].ip[1]=(i+1)%pnum; mface[i].ip[2]=(i+1+2)%pnum; mface[i+1].ip[0]=i%pnum; mface[i+1].ip[1]=(i+1+2)%pnum; mface[i+1].ip[2]=(i+2)%pnum;")
23
OpenGL Shading void Draw……(void) {
// glClearColor(1.0f, 1.0f, 1.0f, 1.0f); // 화면 배경 색 흰색으로 설정 // 칼라 버퍼와 깊이 버퍼 초기화 glClear(GL_COLOR_BUFFER_BIT | GL_DEPTH_BUFFER_BIT); glEnable (GL_DEPTH_TEST); // 깊이 테스트 켬 glEnable(GL_COLOR_MATERIAL); // 물체의 재질 패러미터 사용 if (cull) glEnable(GL_CULL_FACE); // Culling 사용 else glDisable(GL_CULL_FACE); if (light) glEnable(GL_LIGHTING); // 조명 켬 else glDisable(GL_LIGHTING); glPolygonMode(GL_FRONT_AND_BACK, GL_LINE); // 선구조형상으로 표현 // glPolygonMode(GL_FRONT_AND_BACK, GL_FILL); // 쉐이딩으로 표현 // 모델링단계에서 설정한 모델링 리스트의 1번을 부름 glCallList(1); // 더블 버퍼 사용: 화면 버퍼와 백버퍼를 교환 속도향상 glutSwapBuffers(); }
; // 화면 배경 색 흰색으로 설정. // 칼라 버퍼와 깊이 버퍼 초기화. glClear(GL_COLOR_BUFFER_BIT | GL_DEPTH_BUFFER_BIT); glEnable (GL_DEPTH_TEST); // 깊이 테스트 켬. glEnable(GL_COLOR_MATERIAL); // 물체의 재질 패러미터 사용. if (cull) glEnable(GL_CULL_FACE); // Culling 사용. else glDisable(GL_CULL_FACE); if (light) glEnable(GL_LIGHTING); // 조명 켬. else glDisable(GL_LIGHTING); glPolygonMode(GL_FRONT_AND_BACK, GL_LINE); // 선구조형상으로 표현. // glPolygonMode(GL_FRONT_AND_BACK, GL_FILL); // 쉐이딩으로 표현. // 모델링단계에서 설정한 모델링 리스트의 1번을 부름. glCallList(1); // 더블 버퍼 사용: 화면 버퍼와 백버퍼를 교환 속도향상. glutSwapBuffers(); }")
Similar presentations

.>")


>")


 1. Drawing in 3D 2. Manipulating 3D Space>")

 SNSLAB 발표 : 문동규.>")


.>")

>")

